Which Sanding Grain Is Best For Finishing Plaster? The Ultimate Guide
When it comes to finishing plaster, choosing the right sanding grain can make or break your project. Whether you're a professional contractor or a DIY enthusiast, understanding the nuances of sandpaper grits is crucial for achieving that flawless final touch. But here's the thing—there's no one-size-fits-all solution. The perfect sanding grain depends on several factors, including the type of plaster, surface texture, and desired finish. So, buckle up, because we're about to dive deep into the world of sanding grains!
Now, let's be real. Sanding might not sound like the most glamorous part of a renovation project, but it's one of the most important steps. Think about it—no matter how smooth your plaster looks after application, there will always be tiny imperfections that need addressing. And that's where sanding comes in. It's like the secret weapon that transforms a good finish into an outstanding one.
Before we get into the nitty-gritty, let's set the stage. This guide isn't just another list of sanding grains. We're going to break down everything you need to know about sanding plaster, from the basics to advanced techniques. By the end of this article, you'll have the knowledge and confidence to tackle any plaster finishing project with ease. So, grab your sandpaper and let's get started!
Understanding Sanding Grains for Plaster Finishing
What Are Sanding Grains?
Alright, let's start with the basics. Sanding grains refer to the size of the abrasive particles on sandpaper. These grains are measured in numbers, with lower numbers indicating coarser grains and higher numbers representing finer grains. For example, 60-grit sandpaper is much rougher than 220-grit sandpaper. But here's the kicker—when it comes to plaster finishing, you don't want to go too coarse or too fine. It's all about finding the sweet spot.
Here's a quick rundown of the most common sanding grains used in plaster finishing:
- 80-120 Grit: Coarse grains for rough shaping and removing large imperfections.
- 150-180 Grit: Medium grains for smoothing out surfaces and preparing them for finer sanding.
- 220-320 Grit: Fine grains for achieving a smooth, polished finish.
- 400+ Grit: Superfine grains for ultra-smooth finishes and final touches.
Remember, the goal is to progressively work your way up from coarser to finer grains. This ensures a smooth transition and prevents damage to the plaster surface.
Choosing the Right Sanding Grain for Your Project
Factors to Consider
Not all plaster projects are created equal. The type of plaster, surface texture, and desired finish all play a role in determining the best sanding grain. Let's break it down:
Type of Plaster
First things first—what kind of plaster are you working with? Traditional lime plaster, modern gypsum plaster, or decorative Venetian plaster? Each type has its own characteristics and requires a different approach to sanding. For instance, lime plaster is softer and more porous, so you'll want to use finer grains to avoid damaging the surface. On the other hand, gypsum plaster is harder and more durable, allowing for slightly coarser grains.
Surface Texture
The texture of your plaster surface also affects your sanding strategy. If you're working with a smooth finish, you'll want to use finer grains to maintain that sleek look. But if you're dealing with a textured or troweled finish, you might need to start with coarser grains to level out the surface before moving on to finer ones.
Desired Finish
Finally, consider the type of finish you're aiming for. Are you going for a high-gloss polish or a matte, natural look? For a glossy finish, you'll need to use the finest grains available and possibly even wet sanding techniques. For a matte finish, medium to fine grains should do the trick.
Step-by-Step Guide to Sanding Plaster
Preparation is Key
Before you start sanding, make sure your workspace is properly prepared. Cover the floor with drop cloths, remove any furniture from the area, and wear protective gear, including a dust mask and safety goggles. Trust me, you don't want to inhale all that plaster dust!
Start with Coarse Grains
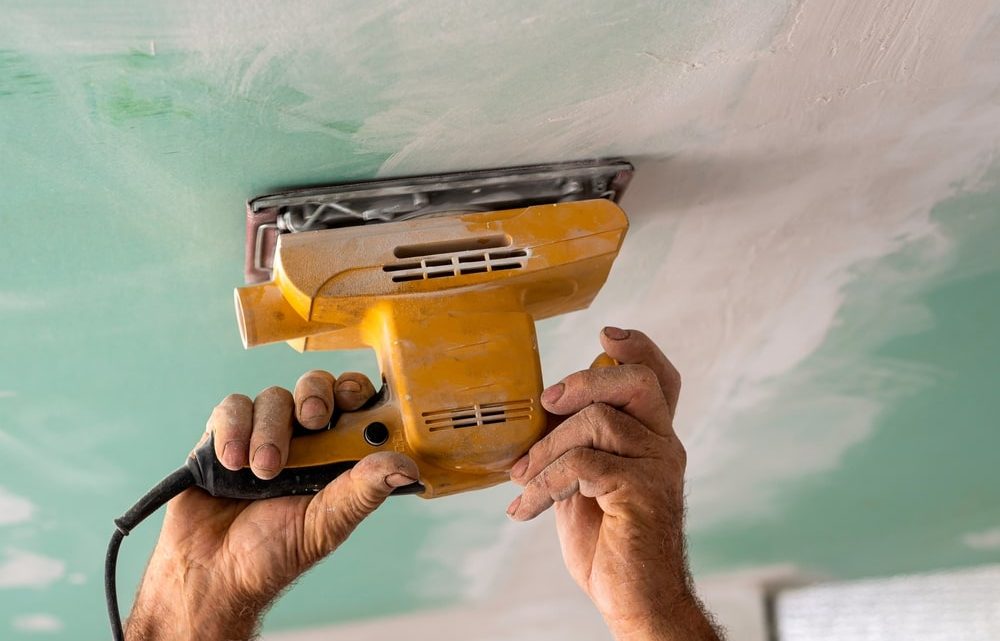
Begin with a coarse grain, such as 80-120 grit, to remove any major imperfections. Use a palm sander or sanding block to ensure even pressure and prevent gouging the plaster. Work in long, smooth strokes and avoid pressing too hard.
Move to Medium Grains
Once you've addressed the big issues, switch to a medium grain, like 150-180 grit. This will help smooth out the surface and prepare it for finer sanding. Again, use a sander or sanding block to maintain consistency.
Finish with Fine Grains
For that flawless finish, finish with a fine grain, such as 220-320 grit. This will remove any remaining imperfections and give your plaster a smooth, polished look. If you're aiming for an ultra-smooth finish, consider using 400+ grit sandpaper for the final touch.
Common Mistakes to Avoid
Skipping Grits
One of the biggest mistakes people make is skipping grits. Going straight from a coarse grain to a fine grain can leave scratch marks and uneven surfaces. Always progress through the grits in order to achieve the best results.
Using the Wrong Technique
Another common mistake is using the wrong technique. Sanding too aggressively or unevenly can damage the plaster surface. Always use a sander or sanding block and maintain consistent pressure.
Not Wearing Protective Gear
Finally, never underestimate the importance of protective gear. Inhaling plaster dust can be harmful to your health, so always wear a dust mask and safety goggles. Your lungs will thank you later!
Advanced Techniques for Perfect Finishes
Wet Sanding
For ultra-smooth finishes, consider wet sanding. This involves using water to lubricate the sanding process, reducing dust and heat buildup. It's especially effective for high-gloss finishes and can help achieve that professional look.
Using Specialty Sandpapers
There are also specialty sandpapers designed specifically for plaster finishing. These often feature non-clogging coatings and are ideal for use with wet sanding techniques. If you're working on a large project, investing in these specialty papers can save you time and effort.
Tools and Materials You'll Need
Sanders
While hand sanding is possible, using a sander can make the process much faster and more efficient. Orbital sanders are great for large, flat surfaces, while detail sanders are perfect for tight spaces and intricate designs.
Sanding Blocks
If you prefer hand sanding, a sanding block is a must-have tool. It helps distribute pressure evenly and prevents gouging the plaster surface.
Protective Gear
As mentioned earlier, protective gear is essential. A dust mask, safety goggles, and gloves will keep you safe and comfortable while sanding.
Tips and Tricks for Successful Sanding
Work in Sections
Instead of trying to sand the entire surface at once, break it down into smaller sections. This will help you maintain consistency and avoid missing spots.
Check Your Progress
Periodically step back and check your progress. Use a flashlight to highlight any imperfections and make adjustments as needed.
Be Patient
Sanding is a time-consuming process, but patience pays off. Rushing through the steps can lead to mistakes and uneven finishes, so take your time and do it right the first time.
Conclusion
In conclusion, choosing the right sanding grain for finishing plaster is crucial for achieving professional results. By understanding the factors that affect your choice, following a step-by-step guide, and avoiding common mistakes, you can transform any plaster surface into a work of art. So, whether you're tackling a small DIY project or a large-scale renovation, remember to take your time, use the right tools, and most importantly, have fun!
Now, it's your turn. Have you tried any of these techniques? Share your experiences in the comments below and let us know how they worked for you. And don't forget to check out our other articles for more tips and tricks on home improvement and DIY projects. Happy sanding!
Table of Contents
- Which Sanding Grain is Best for Finishing Plaster? The Ultimate Guide
- Understanding Sanding Grains for Plaster Finishing
- Factors to Consider
- Type of Plaster
- Surface Texture
- Desired Finish
- Step-by-Step Guide to Sanding Plaster
- Common Mistakes to Avoid
- Advanced Techniques for Perfect Finishes
- Tools and Materials You'll Need
- Tips and Tricks for Successful Sanding
- Conclusion
Detail Author:
- Name : Deon Gorczany PhD
- Username : oreilly.kaia
- Email : dorothy.murray@kilback.com
- Birthdate : 1972-08-28
- Address : 97401 Joany Mall Suite 705 Jacklynbury, VA 82243
- Phone : +1.351.397.7027
- Company : Schinner-Nienow
- Job : Poet OR Lyricist
- Bio : Pariatur et facere dignissimos ut est veniam. Laboriosam voluptatem reiciendis ut autem velit molestiae enim voluptatem. Quisquam minima consectetur pariatur quidem dicta.
Socials
instagram:
- url : https://instagram.com/ginobartoletti
- username : ginobartoletti
- bio : Vero aut quia atque dolores consequatur. Omnis quo ipsa ipsum officia facilis beatae voluptas ut.
- followers : 6367
- following : 2097
tiktok:
- url : https://tiktok.com/@gino_bartoletti
- username : gino_bartoletti
- bio : Laborum harum consequuntur facilis consequatur et enim odit.
- followers : 6052
- following : 216
facebook:
- url : https://facebook.com/gino.bartoletti
- username : gino.bartoletti
- bio : Sed officia eaque non facere molestiae qui aut.
- followers : 1239
- following : 846
linkedin:
- url : https://linkedin.com/in/ginobartoletti
- username : ginobartoletti
- bio : Et deleniti vero et doloribus.
- followers : 6140
- following : 2770
twitter:
- url : https://twitter.com/gino.bartoletti
- username : gino.bartoletti
- bio : Nihil voluptatem vel quos. Non explicabo aperiam et molestiae provident. Sapiente porro fuga est velit cum ipsa nihil.
- followers : 1725
- following : 1015
