How To Change The Glow Plug On A 1.5 DCi Engine: A Step-by-Step Guide
So listen up, folks. If you're reading this, chances are you're dealing with a stubborn diesel engine that's refusing to start, or maybe you're just trying to keep your Renault running smoothly. Changing the glow plug on a 1.5 dCi engine might sound intimidating, but trust me, it's not as bad as it seems. Let’s dive right into it, shall we? This guide will walk you through everything you need to know about the changer poire d'amorçage 1.5 dci process.
Now, why exactly are we talking about glow plugs? Well, these little guys are crucial for getting your diesel engine fired up, especially in colder weather. If they go bad, your car might struggle to start or run rough. So yeah, it’s kind of a big deal. Luckily, replacing them isn’t rocket science, and with a bit of patience, you can totally tackle this job yourself.
Before we get our hands dirty, let’s cover some basics. The Renault 1.5 dCi engine is pretty popular, and glow plug issues are more common than you’d think. Whether you’re working on a Clio, Megane, or any other Renault model, the process is pretty similar. So grab your tools, and let’s get started!
Understanding the Glow Plug System
First things first, you gotta know what you're dealing with. The glow plug system in a 1.5 dCi engine is designed to help ignite the fuel-air mixture in the combustion chamber. Think of them as little heaters that warm up the engine to make starting smoother. If one or more of these plugs fail, your engine might have trouble firing up, especially in cold weather.
Here are some common symptoms that indicate your glow plugs might be on the fritz:
- Hard starting, especially in cold weather
- White smoke coming from the exhaust
- Rough idling or misfiring
- Increased fuel consumption
Now, before you go replacing the glow plugs, it’s a good idea to test them first. You don’t wanna replace something that’s still working fine, right? Most auto parts stores offer testing services, or you can use a multimeter if you’re feeling adventurous.
Tools You’ll Need for the Job
Alright, let’s talk tools. You don’t need a ton of fancy equipment to change the glow plugs on a 1.5 dCi engine, but having the right ones will make the job a lot easier. Here’s a quick list of what you’ll need:
- Socket set (usually 8mm or 10mm for glow plug removal)
- Wrenches (adjustable and fixed sizes)
- Glow plug tester or multimeter
- Replacement glow plugs (make sure they’re the right ones for your engine)
- Clean rags or paper towels
Pro tip: Don’t skimp on quality when buying replacement glow plugs. Sure, the cheap ones might be tempting, but they could end up causing more problems down the line. Stick with reputable brands like Bosch or Denso for the best results.
Step-by-Step Guide to Changing Glow Plugs
Now that you’ve got your tools and parts ready, let’s walk through the actual process. This might take a bit of time, but trust me, it’s worth it. Here’s how you do it:
Step 1: Disconnect the Battery
Safety first, folks. Before you start tinkering with your engine, disconnect the negative terminal of your battery. This will prevent any accidental sparks or short circuits while you’re working.
Step 2: Locate the Glow Plugs
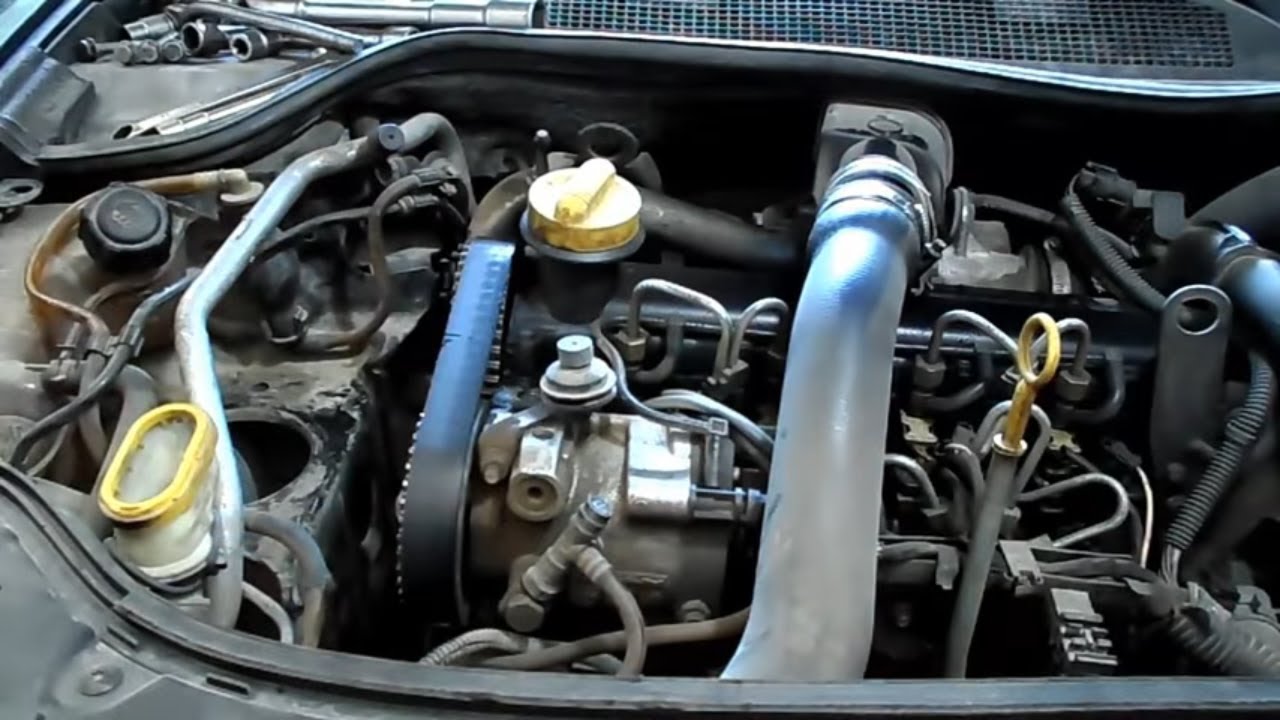
Next, you’ll need to find the glow plugs. On most 1.5 dCi engines, they’re located on top of the engine block, usually covered by a rubber boot or connector. Take a good look at your engine bay and locate them carefully.
Step 3: Disconnect the Wiring
Once you’ve found the glow plugs, carefully disconnect the wiring harness from each one. Make sure you don’t damage the connectors while doing this. Gently pull them off, and set them aside.
Step 4: Remove the Old Glow Plugs
Now comes the fun part. Using the appropriate socket, unscrew the old glow plugs from the engine block. Be gentle here; you don’t want to strip the threads or damage the surrounding components. If a plug feels stuck, you might need to apply a bit of penetrating oil to loosen it up.
Step 5: Clean the Area
Before installing the new glow plugs, take a moment to clean the area around the glow plug holes. Use a clean rag or paper towel to wipe away any dirt or debris. This will help ensure a proper seal when you install the new plugs.
Step 6: Install the New Glow Plugs
Now it’s time to put in the new glow plugs. Hand-tighten them first to make sure they’re aligned properly, then use your socket to tighten them to the manufacturer’s recommended torque specifications. Don’t over-tighten them, or you could damage the threads.
Step 7: Reconnect the Wiring
Once all the new glow plugs are in place, reconnect the wiring harness. Make sure everything is securely attached and double-check your work to ensure nothing was missed.
Step 8: Reconnect the Battery
With the glow plugs replaced, it’s time to reconnect the battery. Attach the negative terminal back to the battery, and you’re almost done.
Step 9: Test the Engine
Finally, it’s time to fire up the engine and see if everything’s working as it should. Start the car and listen for any unusual noises or performance issues. If everything sounds good, congrats! You’ve successfully replaced your glow plugs.
Tips and Tricks for a Smooth Process
Changing glow plugs might seem straightforward, but there are a few things you can do to make the job easier:
- Work in a well-lit area to avoid mistakes
- Take photos of the engine bay before you start, so you can refer back to them if needed
- Use high-quality replacement parts to ensure longevity
- Double-check your work at every step to avoid unnecessary troubleshooting
And hey, if something doesn’t feel right, don’t hesitate to consult a professional mechanic. Better safe than sorry, right?
Common Issues and How to Fix Them
Even with the best intentions, things can go wrong sometimes. Here are a few common issues you might encounter when changing glow plugs and how to fix them:
Issue 1: Glow Plug Won’t Budge
Sometimes, an old glow plug can get stuck in the engine block. If this happens, try applying some penetrating oil and letting it sit for a while before attempting to remove it again. If that doesn’t work, you might need to use a breaker bar to provide extra leverage.
Issue 2: Leaking Oil
If you notice oil leaking from around the glow plug holes after installation, it could mean the new plugs weren’t tightened properly. Double-check the torque specifications and make sure everything’s secure.
Issue 3: Engine Still Won’t Start
If your engine still won’t start after replacing the glow plugs, there could be other issues at play. Check the fuel filter, injection pump, and other related components to rule out other potential problems.
How Often Should You Replace Glow Plugs?
This is a question a lot of people ask, and the answer can vary depending on several factors. On average, glow plugs should last around 50,000 to 100,000 miles, but if you live in a colder climate or do a lot of short trips, you might need to replace them sooner. Regular maintenance and checking for symptoms can help you stay on top of things.
Saving Money by Doing It Yourself
One of the biggest advantages of changing your own glow plugs is saving money. A professional mechanic might charge you a pretty penny for this job, but if you do it yourself, you can cut costs significantly. Plus, you’ll gain valuable knowledge about your vehicle, which is always a plus.
Conclusion
And there you have it, folks. Changing the glow plugs on a 1.5 dCi engine might seem daunting at first, but with a bit of patience and the right tools, it’s a job you can definitely tackle yourself. Remember to stay safe, take your time, and don’t hesitate to ask for help if you need it.
So, what are you waiting for? Grab your tools, roll up your sleeves, and get to work. Once you’re done, you’ll have the satisfaction of knowing you fixed your own car and saved some cash in the process. And hey, don’t forget to share this guide with your friends if you found it helpful. Until next time, happy wrenching!
Table of Contents
- Understanding the Glow Plug System
- Tools You’ll Need for the Job
- Step-by-Step Guide to Changing Glow Plugs
- Step 1: Disconnect the Battery
- Step 2: Locate the Glow Plugs
- Step 3: Disconnect the Wiring
- Step 4: Remove the Old Glow Plugs
- Step 5: Clean the Area
- Step 6: Install the New Glow Plugs
- Step 7: Reconnect the Wiring
- Step 8: Reconnect the Battery
- Step 9: Test the Engine
- Tips and Tricks for a Smooth Process
- Common Issues and How to Fix Them
- How Often Should You Replace Glow Plugs?
- Saving Money by Doing It Yourself
- Conclusion

Detail Author:
- Name : Anne Marquardt
- Username : deonte.jacobi
- Email : ngusikowski@gmail.com
- Birthdate : 1987-10-30
- Address : 146 Hackett Lodge Jerodville, CA 24624-0763
- Phone : 689-613-0108
- Company : Lueilwitz, Bradtke and Boehm
- Job : Operations Research Analyst
- Bio : Ab eos sit non consequatur. Atque blanditiis officiis explicabo minus. Dolor debitis dolor alias ex ut.
Socials
linkedin:
- url : https://linkedin.com/in/toy1991
- username : toy1991
- bio : Aut omnis eius magnam est.
- followers : 539
- following : 2381
facebook:
- url : https://facebook.com/lonny.toy
- username : lonny.toy
- bio : Rerum et dolores itaque placeat aut cumque adipisci.
- followers : 933
- following : 100
